
Hello stamping friends! The weekend is almost here… are you happy? I sure am! But today is Thursday, and that means it’s time for another fabulous Deconstructed Sketch! Check out sketch #161…

This is definitely different from what I’d usually do, but an idea came to me pretty quickly and I just LOVE the results! Check it out…

When I was in Florida recently at the My Favorite Things store, the Die-Namics Jumbo Cloud STAX was an item that was in my shopping basket very early on… I just needed it! Do you know how that goes? So, I grabbed it for my card today, cutting it out with Sweet Tooth card stock. Then I stamped some LJD Darling Dots on the cloud with Sweet Tooth pigment ink, and embossed with clear embossing powder. On the Nightshift Blue card stock background I embossed some clouds using the Cloudy Day stencil. And on the Berrylicious card stock background piece I stamped the BG Grid background in Berrylicious hybrid ink. I added a Fishtail Flags STAX in Berrylicious card stock and a Sweet Tooth card stock flag from the Blueprints 13 below the sentiment panel.
Now, for the sentiment panel, I used some SU! Crisp Cantaloupe card stock. Want to know my easy-peasy way for making that cool double-ended banner? Here, I’ll gladly show you!

")
")
I used a pencil to very lightly mark off 2 1/2” of space for my sentiment (you can just barely see my pencil marks, I think!) and stamped using Tangy Orange hybrid ink. (My sentiment is from the Blue Skies Ahead stamp set.) Then I went to my cutting board, and trimmed the sentiment piece to 3 1/2”, keeping the sentiment centered. (Forgot to photograph that step… oops!) Be sure to save that flag end you just cut off!
")
I then placed that 3 1/2” piece of card stock on my Scor-Pal, and scored each end at 1/4”.
")
")
")
Then I just trimmed off the excess underneath, and there you’ve got the double-ended, folded banner for the front of your card!
")
I find this method a LOT easier than trying to fold twice on each end to achieve this look, and I NEVER get them even when I try that. This works much better for me! If you don’t already have a set of Fishtail Flags STAX or Pierced Fishtail Flags STAX Die-Namics, I highly recommend picking up one set or both! I think they are my most-used dies, and have such a large variety of sizes… you’ll use them constantly, trust me!
On the inside of my card, I added a few Flat-Bottom Clouds cut from Berrylicious card stock, and another sentiment from the Blue Skies Ahead stamp set stamped in Berrylicious hybrid ink.

I hope you’ll give this sketch a try this week! Hop on over to Jen’s blog for all the Deconstructed Sketch details, and visit the team members listed here for more inspiration…
- Arielle Gordon
- Cresta Woodruff
- Jen Shults
- Joanne Basile (taking a break this week)
- Kim O’Connell
- Sheri Gilson
- Tangii Crain
- Tracey Pickersgill

All products from My Favorite Things unless otherwise noted…
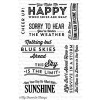
Stamps: CS Blue Skies Ahead, BG Grid background, LJD Darling Dots
Card stock: Berrylicious card stock, Nightshift Blue card stock, Sweet Tooth card stock; Crisp Cantaloupe card stock (Stampin’ Up!)
Inks: Berrylicious hybrid ink, Tangy Orange hybrid ink, Sweet Tooth pigment ink
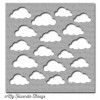
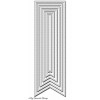
Dies and Stencils: Jumbo Cloud STAX Die-Namics, Pierced Fishtail Flags STAX Die-Namics, Fishtail Flags STAX Die-Namics, Flat-Bottom Clouds Die-Namics, Blueprints 2, Blueprints 11, Blueprints 13; Cloudy Day stencil
Accessories: enamel dots (Doodelbug), clear embossing powder (Ranger)
Many, many thanks for visiting me today! I appreciate it!
11 comments:
I just got my socks knocked off, gf!! Absolutely STUNNING card! And thanks for the awesome tutorial! I'll have to try this since I have the same problem when folding the ends--fabulous job!!
Love your take on this sketch. very fun. thanks for the tutorial on how to make a good banner.
LOVE it! great texture on those white clouds too and I'm really loving those pierced dies... guess I may need to cave and order some ;)
Great card, Tammy! Love how you created the banner...mine just arrived so I will have to give it a try!
Fantastic card I love the tut for your banner how very clever.....I so have to try this :)
Great card! It's very clever how you cut the banner!
This is gorgeous Tammy. The orange and blue are perfect together. receiving this card would definitely cheer me up :)
This is awesome Tammy! Thanks for the great tip on how you made that banner. I LOVE it!
This is a great tutorial. Thanks for your lovely comment today over at my blog. Have a great week!
I just love this card, Tammy! Thanks for the super helpful tips on making that awesome banner! The Fishtail Flags are the BEST dies, and you are not alone in using the OLD Cuttlebug... I am right there with ya! Have a great day!
Woo hoo! Now that is too cool! Neater than damn it!!
Post a Comment