
It’s that time of year again… time for the awesome Dare to Get Dirty challenges over at Splitcoaststampers! This is always such a fun week full of fun challenges, and chances for lots of great prizes, too! Of course, to participate you have to be a Fan Club member, so if you’re not be sure to check it out by clicking this Fan Club link.

The challenges started yesterday, and I created this card as a sample for Kittie’s challenge…

This is going to be a long blog post, so I’ll keep details for this to a minimum. A list of supplies is at the end of my post, and if you have questions about anything just leave a comment or shoot me an email! :)
Now, here’s my card for Bridget’s challenge today…

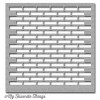
I did a little bit of stenciling on this card, in case you can’t tell and below I’ve got some extra photos to show you what I did. I started out with a piece of Berrylicious card stock that I cut with the Blueprints 13 Die-Namics. Then I used Berrylicious hybrid ink and the Small Brick Wall stencil to create the background.

I have a mini-mister that I used to mix up some Berrylicious premium dye ink refill and some MIX-ables Sheer Shimmer Mist, and used it to spritz the background after I stenciled it for a little bit of shimmer. I also used the wand from the mini-mister to manually splatter a little bit of ink, too.
Then I used a piece of acetate to create a custom stencil from my Leaf-Filled Flourish Die-Namics! Your dies can take on a whole new meaning when you look at them with the thought of creating your own stencils!

And here’s where we get to have some good, messy fun! Now, I always knew that you could take a bottle of ink and mix it with white embossing paste for custom colors. But what I didn’t really think about was the fact that you can just apply ink from an ink pad (here I’m using Jellybean Green hybrid ink) directly to your craft sheet and mix your paste into it!

I kept my paste close to the lower edge of the ink, then gradually kept working it into the ink until I had the color intensity that I wanted…

Then I used some masking tape to secure my stencil over my cardstock…

And then, working very gently and carefully I applied my embossing paste. I say use some caution here, just because the acetate is a little flimsier than the vinyl you’re used to with stencils. Plus the design is a little more intricate here since I used the Leaf-Filled Flourish die.

And then, voila! A stenciled Leaf-Filled Flourish over your Small Brick Wall stencil background!

And here’s the finished card again…

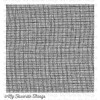
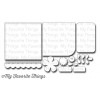
I added a Blueprints 14 flower cut from Orange Fizz card stock, with a Tangy Orange card stock flower layered underneath, that was stamped with the BG Linen background stamp in Tangy Orange hybrid ink. The sentiment from the LJD Birthday Greetings stamp set is stamped in Tangy Orange hybrid ink on a Pierced Fishtail Flags STAX Die-Namics.
I’m entering this card also in the Anything Goes challenge going on over at Simon Says Stamp! :)
Here are my supplies…

So, I hope you’ll stop over at Splitcoaststampers and check out all the fun with the Dare to Get Dirty challenges! And remember, if you’re not already a Fan Club member you won’t be able to join in or see the challenges so please consider joining and supporting SCS!
Thanks for stopping by!






I absolutely love her in the window Tammy.
ReplyDeleteGreat tutorial, thank you. Love all the texture going on!
ReplyDeleteLove your cards Tammy! Don't you just love embossing paste, stencils, and dies? I'm so hooked them!
ReplyDeleteGreat tute, Tammy! And fabulous cards!!
ReplyDeleteThat beautiful flower against the bricks is so lovely, Tammy! Thanks for playing along with us at the Simon Says Stamp Wednesday challenge!
ReplyDelete